Get ready for a fun challenge. You can build your very own drone from scratch. This guide is full of expert advice, hands-on tips, and step-by-step instructions to help you make a custom drone that works for you. We have everything you need to build, customize, and fly your own drone. You can build and customize your drone with confidence, no matter what your experience level is. So let’s get started and make your DIY drone dreams a reality!
Why Choose the DIY Drone Route?
Building your own drone is a rewarding experience, offering both practical and educational benefits. Let’s explore the advantages in more detail:

Money-Saving Tips:
- Cost Savings – 30-40% Less than Pre-Built Models:
- Pre-built drones can be expensive, especially if you’re looking for higher-end models with advanced features like GPS, longer battery life, or high-quality cameras. By building a drone yourself, you cut out the markup and labor costs associated with commercial production.
- A DIY drone typically costs 30-40% less than an equivalent pre-built drone. You can select components that match your budget and requirements, allowing for more cost-effective decisions without compromising on quality.
- Upgrade Components Gradually:
- One of the key benefits of building a DIY drone is the ability to upgrade components over time. Instead of purchasing a whole new drone, you can start with a basic setup and improve it piece by piece. For instance:
- Motors: Upgrade for better speed or efficiency.
- ESCs (Electronic Speed Controllers): Replace with more powerful ones for better performance.
- Camera: Install a higher-quality camera for better aerial photography.
- This gradual upgrade path allows you to invest in better components as your budget permits, keeping the overall cost manageable.
- One of the key benefits of building a DIY drone is the ability to upgrade components over time. Instead of purchasing a whole new drone, you can start with a basic setup and improve it piece by piece. For instance:
- Cheaper Repairs with DIY Knowledge:
- When you know how your drone is put together, repairs become easier and cheaper. If something breaks (like a motor, propeller, or ESC), you can troubleshoot the issue yourself and replace only the damaged part.
- With pre-built drones, repair costs often include labor fees and expensive parts from the manufacturer. With a DIY drone, you can source cheaper components from various suppliers and handle repairs on your own.
- Save Money by Choosing Exactly What You Need:
- Pre-built drones often come with extra features you might not need, leading to higher costs. When building your own, you have the freedom to choose the exact components required for your specific use case (e.g., if you need a drone for racing, you can focus on lightweight components, or for aerial photography, you can invest in a good camera system).
- This customization ensures you’re not paying for unnecessary features or components.
DIY Learning Benefits:
- Master Basic Electronics:
- Building a DIY drone will help you understand basic electronics. You’ll get familiar with components like motors, flight controllers, ESCs, GPS modules, and sensors. Learning how to connect and power these parts can deepen your understanding of how electronics work.
- You’ll also gain hands-on experience with wiring, circuit boards, and various electrical connections, which is a valuable skill in many tech-related fields.
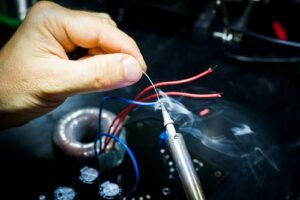
- Develop Soldering Skills:
- Soldering is an essential skill for assembling a drone. Whether you’re connecting motors to ESCs or securing wires to the flight controller, knowing how to solder properly is a must.
- As you build more drones or perform repairs, your soldering skills will improve, and you’ll become proficient at making clean, durable connections.
- Understand Flight Dynamics:
- Understanding how drones fly and how various components work together (motors, sensors, flight controllers, etc.) is key to building a successful drone.
- You’ll gain insights into how flight dynamics work, including stability, control, and how the drone reacts to various inputs. This knowledge will help you in both tuning your drone for better performance and troubleshooting issues like poor stability or responsiveness.
- Learn About Power Systems:
- A drone’s power system is a crucial aspect of its design. You’ll learn how batteries, ESCs, and power distribution boards (PDBs) interact with one another to deliver the necessary power for flight.
- You’ll also understand battery capacities, power draw, and how to balance energy consumption with flight time, which is a key part of optimizing a drone for performance.
- Gain Troubleshooting Expertise:
- In the world of DIY drones, troubleshooting is a key part of the process. Whether it’s an issue with flight performance, sensors, or motor malfunctions, you’ll gain expertise in diagnosing and fixing problems.
- This knowledge will come in handy not just for your current drone, but for future builds or when dealing with other electronics projects.

Pro Tip: Start Collecting Tools and Components Gradually!
- Initial investment in tools and components can be significant, especially if you’re just starting. However, you don’t have to buy everything upfront. Start collecting tools (soldering iron, multimeter, screwdrivers, etc.) and components (motors, ESCs, flight controller) gradually.
- By spreading out the costs over time, you can ease the financial burden and only purchase what you need at each stage of the build. This approach allows you to make well-informed choices and avoid impulse buying.
In conclusion, choosing the DIY drone route offers both financial savings and valuable learning opportunities. It’s an excellent project if you’re looking to develop technical skills, personalize your drone, and save money on repairs and upgrades. Plus, you’ll gain a deeper understanding of how drones work, making you a more skilled and self-sufficient builder.
DIY Drone Types: Choosing Your Perfect Build
Let’s explore different drone types with specific DIY tips for each category:
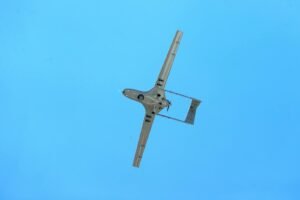
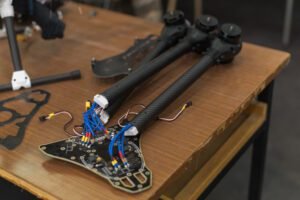
1. Fixed-Wing Drones
- Overview:
- Best for long-distance flights: Fixed-wing drones are ideal for covering large areas with fewer battery limitations, making them great for tasks like aerial mapping and surveying.
- More efficient in terms of power consumption: Due to their aerodynamics, fixed-wing drones can fly for long durations without consuming as much power as multi-rotors.
- Requires more space for takeoff and landing: Unlike multi-rotor drones, fixed-wing drones need a runway or a larger open space for takeoff and landing.
- Commonly used in surveying, monitoring, and agricultural applications: These drones are often deployed for land surveys, crop monitoring, and other commercial purposes requiring broad coverage.
- Building Tips:
- Use foam board for your first build: Foam is light, easy to shape, and cheap, making it ideal for prototyping. It’s also easy to repair in case of crashes.
- Start with a wingspan under 1 meter: Smaller wingspans are easier to handle, especially when you’re just starting out, and they still offer good flight times.
- Consider push-propeller designs: A push-propeller setup (where the propeller is at the rear) offers better protection against damage during crashes, especially during landing.
- Add reinforcement at stress points with carbon fiber rods: Fixed-wing drones endure significant stress, especially on wings. Reinforcing these areas with lightweight carbon fiber rods can improve durability without adding much weight.
- Pro DIY Tip: Create a removable wing design: This will make it easier to transport and store your drone, especially when traveling or storing it in tight spaces.
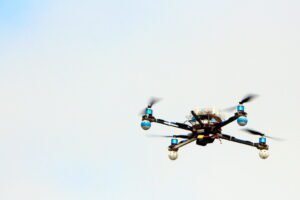
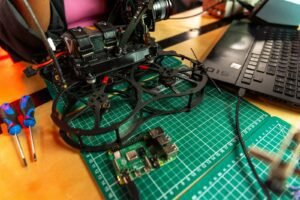
2. Multi-Rotor Drones
- Overview:
- Most popular among DIY builders: Multi-rotor drones, such as quadcopters, hexacopters, and octocopters, are the go-to choice for most DIY drone enthusiasts due to their versatility, ease of use, and range of applications.
- Offers high stability and maneuverability: Multi-rotors can hover in place, change direction easily, and maintain a stable position in the air, making them ideal for tasks like photography and filming.
- Ideal for photography, videography, and hobbyist projects: Multi-rotors are excellent for capturing stable footage, and they are highly customizable.
- Drone Types and Tips:
- Quadcopters (4 rotors):
- Perfect for DIY beginners: Quadcopters are the most common and easiest type of multi-rotor to build and control. They offer a stable flight and are simpler to balance and configure.
- Easiest to balance and configure: With only four motors, quadcopters are simpler to tune, especially for beginners.
- Most parts available: The components (motors, flight controllers, ESCs) for quadcopters are widely available and relatively affordable.
- Simplest wiring setup: Quadcopters typically have fewer wires to deal with, which reduces the complexity of assembly.
- Hexacopters (6 rotors):
- Add redundancy for safety: Hexacopters provide an extra layer of safety—if one motor fails, the drone can still fly, making it more reliable than quadcopters.
- Better for heavy lifting: Hexacopters have more power, allowing them to lift heavier payloads (such as larger cameras or sensors), making them ideal for professional aerial photography.
- More stable in wind: With more motors, hexacopters offer better stability in windy conditions compared to smaller quadcopters.
- Ideal for photography builds: The added stability and payload capacity make hexacopters perfect for high-quality video and photography applications.
- Quadcopters (4 rotors):
- Expert Tip: Start with a quadcopter: It’s the best way to learn the basics of building and flying a DIY drone. Once you master the quadcopter, you can progress to more complex builds like hexacopters or octocopters.
3. Hybrid VTOL (Vertical Takeoff and Landing) Drones
- Overview:
- Combines the efficiency of fixed-wing drones with the versatility of multi-rotors: Hybrid VTOL drones can take off and land vertically like a multi-rotor but switch to fixed-wing flight once airborne, making them capable of covering long distances efficiently.
- Suitable for advanced DIY builders: These drones require more complex design and build processes, making them better suited for experienced builders.
- Used in professional applications like mapping, surveillance, and delivery: Hybrid VTOL drones are used in industries where both vertical takeoff and long flight times are required, such as for aerial surveys, deliveries, or surveillance missions.

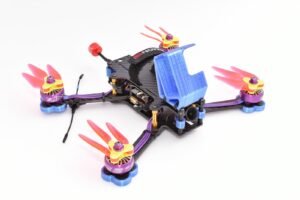
4. FPV Racing Drones
- Overview:
- Built for speed and agility: FPV (First-Person View) racing drones are designed to be fast and maneuverable, ideal for racing competitions and high-speed flying.
- Uses FPV cameras for immersive flying experience: These drones are equipped with cameras that stream live video to the pilot’s goggles or screen, offering an immersive, first-person flying experience.
- Requires high-speed components and real-time control: The components (motors, ESCs, batteries) need to be fast and responsive to ensure the drone can handle the rapid accelerations and decelerations typical of racing.
- Popular in drone racing leagues and competitions: Many hobbyists take part in FPV drone racing leagues, which involve flying through obstacle courses at high speeds.
5. Autonomous and AI-Powered Drones
- Overview:
- Designed for advanced functionalities like object detection and autonomous navigation: These drones incorporate AI (artificial intelligence) and machine learning to perform tasks like path planning, object recognition, and autonomous decision-making.
- Integrates GPS, LiDAR, and AI-based processing: These drones are equipped with high-tech sensors like LiDAR for mapping, GPS for navigation, and powerful onboard processors that enable real-time decision-making.
- Used in robotics research, security, and industrial automation: Autonomous drones are typically used in industrial or research applications, such as automated inspections, surveillance, and even package deliveries.
- Ideal for experienced builders with programming knowledge: Building an autonomous drone requires not only hardware skills but also the ability to program and integrate complex systems, including AI algorithms and sensor data processing.
Conclusion:
When choosing a DIY drone type, it’s important to consider your goals and experience level. Fixed-wing drones are perfect for long-distance, low-power applications like mapping, while multi-rotor drones are the go-to for stability, ease of use, and customization. Hybrid VTOL drones combine the best of both worlds but are more suited for advanced builders, and FPV racing drones are perfect for thrill-seekers. If you’re aiming for cutting-edge technology, autonomous drones offer the latest in AI and automation but require significant technical expertise.
2. Planning Your DIY Drone Project

Defining Your Drone’s Purpose
- Identify Use: Determine whether your drone is for racing, aerial photography, surveying, or general hobby flying.
- Weight and Size: Consider size and weight based on use; racing drones need light and compact builds, while photography drones need larger frames for carrying cameras.
- Flight Time and Range: Define the required flight time and range according to the purpose, like long endurance for surveying or speed for racing.
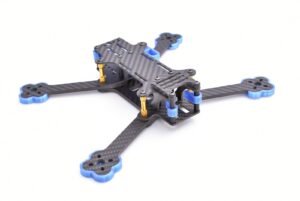
Selecting the Right Frame
- Material Choices:
- Carbon Fiber: Strong and lightweight, ideal for high-performance builds but expensive.
- Aluminum: Good balance of weight and strength, suitable for general builds.
- Plastic: Best for beginners, affordable but less durable.
- Size Recommendations:
- 250mm: Ideal for racing drones.
- 450mm: General-purpose size for everyday use.
- 550mm: Suitable for camera drones and aerial photography.
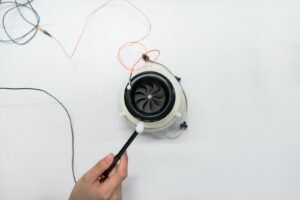
Choosing Motors and Propellers
- Motor Selection Tips:
- Thrust-to-Weight Ratio: Aim for a 2:1 thrust-to-weight ratio for stable flight.
- Motor Size: Choose based on drone category (mini, mid-size, or large).
- Spare Motor: Buy an extra motor as they are prone to failure.
- Propeller Selection Tips:
- Small Props (3-5 inches): Best for speed and agility, ideal for racing drones.
- Large Props (7-10 inches): Provide efficiency and lifting power, ideal for carrying payloads.
- Match Motor and Propeller Specs: Ensure the propeller’s pitch and diameter are compatible with the motor.
3. Essential Drone Components
Frame Selection Guide
Consider weight, durability, and modularity:
Weight: Choose a frame material that balances lightness and strength. Lightweight frames are ideal for racing or agility, while heavier frames are better suited for carrying cameras or additional equipment.
Durability: Ensure the frame is durable enough for your intended use. If you are a beginner, a plastic or foam frame might be easier to handle and repair. For higher-performance drones, carbon fiber or aluminum frames offer better durability.
Modularity for upgrades: Opt for frames that allow easy upgrades, such as mounting points for different components or the ability to change the frame size for future builds.
Ensure compatibility:
Make sure the frame fits your chosen motors, battery, and other components. Each frame has a specific mounting system that must match the size of the motors and the power systems.
Additional tips:
- Reinforce stress points with TPU parts to improve crash resistance.
- Use vibration-dampening pads to reduce impact on electronics.
- Choose a frame with an integrated battery compartment for better weight distribution.

Motor and ESC Selection
Motor and ESC Compatibility:
ESC Current Rating: Choose Electronic Speed Controllers (ESCs) with a current rating higher than the maximum current your motors will draw. A higher rating prevents overheating and provides more stable performance.
BLHeli or SimonK firmware: Opt for ESCs with BLHeli or SimonK firmware, which are known for better throttle response and smoother performance, especially in fast, aggressive maneuvers.
Motor Selection:
Select motors based on drone type (mini, mid-size, or large), ensuring the thrust generated matches your drone’s weight and intended use, whether for racing, photography, or long-range flights.
Make sure the motors can support the required payload and flight times, especially for heavier drones used in aerial photography.
Additional tips:
- Use an ESC with active braking for sharper and more precise control.
- Balance motors and propellers to reduce vibrations and increase efficiency.
- If overheating occurs, ensure there is adequate airflow around the ESCs.
Battery and Power Systems
LiPo Batteries:
Select Lithium Polymer (LiPo) batteries with the right voltage and capacity for your drone. Battery voltage typically ranges from 3.7V (for smaller drones) to 22.2V (for larger, more powerful drones).
The capacity (measured in mAh or Ah) determines how long your drone can fly. Larger capacity batteries provide longer flight times but can add more weight.
Power Distribution Board:
Use a power distribution board (PDB) to efficiently manage connections between the battery and components like the motors and ESCs. This board helps distribute power evenly and reduce wiring clutter.
Additional tips:
- Use high-quality LiPo batteries with a high C-rating to handle power demands efficiently.
- Avoid over-discharging batteries to prolong their lifespan and prevent failure.
- Store batteries in a fireproof case when not in use.
- Use a voltage alarm to monitor battery levels in real time.

Flight Controller Options
Choose between beginner-friendly and advanced controllers:
Beginner-friendly controllers are easier to set up and use, often with automated stabilization and simplified features.
Advanced controllers offer more customization and fine-tuning options, suitable for experienced pilots who want to adjust flight characteristics and optimize performance.
Ensure compatibility:
The flight controller must be compatible with your drone’s frame, ESCs, and motors. Some controllers come with additional features like GPS, stabilization, and telemetry for advanced functionality.
Additional tips:
- Use a flight controller with built-in OSD (On-Screen Display) for real-time telemetry.
- Soft-mount the flight controller to minimize vibrations affecting the gyroscope.
- Upgrade firmware regularly to access new features and performance improvements.
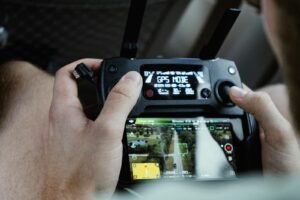
Remote Control and FPV Systems
Reliable Transmitter and Receiver:
Choose a transmitter and receiver with minimal latency for real-time control. High-quality systems provide smooth, precise control, which is especially important in racing or professional drone builds.
FPV (First-Person View) System:
Consider adding an FPV camera and goggles to get an immersive flying experience. FPV systems allow you to see from the drone’s perspective in real time, making it easier to navigate obstacles or fly at high speeds.
Additional tips:
- Use a long-range receiver with dual antennas for better signal stability.
- Choose an FPV camera with a wide dynamic range for better visibility in different lighting conditions.
- Use high-quality antennas to improve video transmission range and minimize interference.
4. Pre-Assembly Preparation
Organizing Components
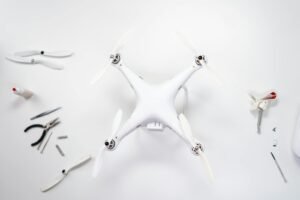
- Lay out all parts: Before beginning assembly, organize all your components on a white surface or clean workspace to help spot small parts easily and avoid losing them.
- Label containers: Create labeled containers for screws, wires, and other hardware to keep everything organized and avoid confusion during assembly.
Setting Up a Proper Workspace
- Clean, well-lit area: Set up your workspace in a clean, well-lit area with ample space for all components and tools. Good lighting helps with small components and detailed work.
- Static-free mat: Use a static-free mat to prevent static electricity from damaging sensitive components, like the flight controller or ESCs. Having all your tools within reach ensures efficient assembly.
Understanding Drone Wiring Basics
- Basic connections: Learn the basic wiring connections between motors, ESCs, flight controllers, and power systems. Understanding these connections helps ensure proper assembly and reduces errors during the build.
- Plan wire routing: Plan the routing of your wires to avoid interference, tangling, or excess clutter that could disrupt the drone’s performance or make it harder to troubleshoot.
5. Assembling the Drone Frame
Attaching Arms and Base
- Secure the Frame:
- Use the recommended screws to attach the arms and base of the drone frame securely. Tighten the screws properly to ensure the drone frame is stable and rigid during flight.
- Apply Thread-Locking Compound:
- To prevent screws from loosening due to vibration during flight, apply thread-locking compound (e.g., Loctite) to the threads of the screws. This ensures they stay tight and prevents any potential issues with loose parts during flight.
Securing Components
- Mount Electronics on Vibration Damping:
- Flight controllers and other sensitive electronics should be mounted on vibration-damping material (like soft foam or rubber pads) to reduce interference from vibrations, ensuring stable flight performance and better sensor accuracy.
- Wire Management:
- Use zip ties and Velcro straps to secure all wires and components. This keeps the wires organized and prevents them from interfering with the motors or moving parts.
Reinforcement Techniques
- Reinforce Stress Points:
- Add extra support at stress points (areas prone to high strain or impact) using carbon fiber rods or reinforced brackets. These reinforcements help improve the structural integrity of the drone, making it more durable and resilient to crashes or rough landings.
6. Installing Motors and ESCs
Positioning Motors Correctly
- Correct Motor Rotation:
- Ensure the motors are positioned correctly according to the flight controller’s diagram. Each motor should be oriented with the correct clockwise (CW) or counter-clockwise (CCW) rotation, as this determines how your drone will stabilize and maneuver.
- Mark Front Arms:
- Mark the front arms of the frame to ensure proper motor orientation and clarity during assembly. This helps prevent confusion later when setting up the drone’s flight controller.
Connecting ESCs to Motors
- Match ESC Wires:
- Connect the ESC wires to the corresponding motor wires. Double-check that each ESC is connected to the correct motor to ensure proper functionality and motor rotation direction.
- Soldering:
- Solder the connections carefully, ensuring a solid and reliable electrical connection. After soldering, use heat shrink tubing to insulate the connections, protecting them from short circuits and providing strain relief.
Securing Wiring and Cable Management
- Route Wires through Frame Channels:
- Route the wires through the designated frame channels to prevent them from getting caught in moving parts or tangled during flight.
- Cable Ties:
- Use cable ties to secure any excess wire. This prevents loose wires from interfering with the drone’s operation and keeps everything neat, reducing the risk of accidents or electrical issues.
7. Flight Controller Setup
Mounting the Flight Controller
- Position at Center of Gravity:
- Mount the flight controller at the drone’s center of gravity to ensure balanced flight. This ensures the drone will fly evenly and handle control inputs more effectively.
- Anti-Vibration Pads:
- Use anti-vibration pads beneath the flight controller to minimize the effects of external vibrations, which can interfere with the controller’s sensors and destabilize flight.
Connecting to the Receiver
- Signal Wiring:
- Connect the flight controller to the receiver (transmitter) by wiring the signal properly. Ensure the wiring is correct for stable communication between the controller and receiver, allowing reliable control during flight.
- Heat Shrink Tubing:
- Use heat shrink tubing to protect the connections from wear and moisture. This provides a secure, long-lasting connection and reduces the chance of signal loss.
Initial Configuration in Software
- Calibrate Input Channels:
- In the flight controller software, calibrate all input channels (e.g., throttle, yaw, pitch, roll). This ensures that all control inputs are mapped correctly to the drone’s movement.
- Set up Failsafes and Flight Modes:
- Configure failsafes (such as the return-to-home function) and set up default flight modes (e.g., stability, acro, GPS hold). These settings help ensure the drone responds correctly in emergency situations and provides reliable flight control.
8. Wiring and Power Distribution
Connecting the Battery
- Battery Strap:
- Use a secure battery strap to firmly hold the battery in place on the drone frame. This ensures that the battery doesn’t shift during flight, preventing potential damage to wires and connectors.
- Proper Polarity:
- Ensure the correct polarity when connecting the battery to avoid short circuits. Double-check that the positive (red) and negative (black) connections are properly matched before connecting.
Soldering Power Distribution Board
- Double-Check Polarity:
- Before soldering the wires to the Power Distribution Board (PDB), double-check the polarity of each connection. Incorrect polarity can lead to component damage or malfunction.
- Heat Shrink Tubing:
- After soldering, apply heat shrink tubing to the connections to provide electrical insulation and physical protection. This prevents short circuits and protects the soldered joints from external elements.
Ensuring Safe Wiring Layout
- Separate Power and Signal Wires:
- Route power wires and signal wires separately. This reduces the potential for electromagnetic interference (EMI) from power cables affecting the signal cables, which is especially important for flight controller or GPS connections.
- Secure Loose Wires:
- Use zip ties or Velcro straps to secure any loose wires and prevent them from making contact with moving parts, such as the motors or props, which could cause damage or interfere with flight control.
9. Sensor and GPS Installation

Mounting and Calibrating Sensors
- Secure Mounting:
- Mount the sensors securely on vibration-damping material to avoid vibrations or misalignment that could affect sensor accuracy. Common sensors include the accelerometer, gyroscope, and barometer.
- Calibration:
- Use your flight software to perform proper accelerometer and gyroscope calibration. This step ensures that the drone’s sensors are aligned correctly and will provide accurate readings for flight control.
- Avoid Interference:
- Keep sensors away from electromagnetic interference sources (such as motors and ESCs) to ensure they function properly without false readings or errors.
Installing GPS Module (If Required)
- Mount GPS High:
- Mount the GPS module in a high location on the drone, ideally away from power sources (such as ESCs and battery). This ensures clear signal reception and prevents electromagnetic interference.
- Vibration Dampening:
- Use vibration dampeners to securely attach the GPS module, preventing any sensor misalignment or interference caused by vibrations during flight.
- Wiring and Baud Rate:
- Verify the wiring of the GPS module to ensure correct connections. Check the baud rate settings to match the GPS and flight controller for seamless data communication.
Configuring Fail-Safes
- Return-to-Home (RTH):
- Set up a return-to-home (RTH) mode in your flight controller to trigger the drone to return to its takeoff point in case of signal loss or low battery.
- Low-Voltage and Signal Loss Protections:
- Configure the low-voltage protection to ensure that the drone lands safely when the battery reaches a critical level. Also, set up signal loss protections to ensure the drone responds appropriately if it loses communication with the remote control.
- Test Fail-Safes:
- Test fail-safe triggers before your first flight to ensure that the drone reacts correctly in the event of a signal loss, low battery, or other emergencies.
10. Final Assembly and Pre-Flight Checks

Checking All Connections
- Verify Tightness of Screws and Bolts:
- Double-check all screws, bolts, and fasteners to ensure they are tightly secured. Loose components can affect the drone’s stability and performance.
- Soldering and Insulation:
- Ensure all wires are properly soldered and insulated to avoid shorts or connection failures. Check for any exposed wires that may come into contact with other components.
- Component Placement Review:
- Perform a final review of your component placement, ensuring that everything is organized, securely attached, and properly routed.
Securing Loose Wires
- Zip Ties and Velcro Straps:
- Use zip ties and Velcro straps to secure any remaining loose wires. This prevents them from interfering with moving parts, such as the motors or propellers.
- Proper Insulation of Power Wires:
- Double-check that all power wires are properly insulated to prevent accidental shorts, which can lead to electrical damage or power loss.
Ensuring Proper Weight Distribution
- Balance the Drone:
- Balance the drone evenly to avoid unnecessary drift during flight. A well-balanced drone will respond more accurately to flight inputs and provide smoother performance.
- Adjust Battery Placement:
- Adjust the battery placement to achieve an optimal center of gravity. This ensures stable flight, better control, and improved handling. Ensure that the battery is securely placed and doesn’t shift during flight.
11. Calibration and Software Configuration for DIY Drone
ESC Calibration
Purpose: The ESC (Electronic Speed Controller) calibration ensures that your ESCs respond correctly to throttle inputs from the flight controller. Proper calibration prevents jerky or unresponsive behavior of the motors, ensuring smooth operation.
Process:
- Connect the ESCs to the flight controller and power up the drone.
- Launch flight controller software (such as Betaflight, INAV, or others) to begin the ESC calibration process.
- Throttle Motor Calibration:
- In the software, set the throttle to its maximum and minimum positions. This action tells the ESCs the range of throttle input they must recognize.
- After calibration, the ESCs should respond to the full range of throttle input, allowing smooth motor acceleration and deceleration.
- Test Motors:
- After completing the calibration, test each motor individually to ensure that they respond consistently and smoothly across the entire throttle range.
- Check for motor vibrations, inconsistencies, or any issues that might indicate improper calibration.
Gyro and Accelerometer Calibration
Purpose: The gyroscope detects the drone’s rotational movement (yaw, pitch, roll), while the accelerometer measures linear acceleration. Calibrating both ensures proper stabilization and accurate flight control.
Process:
- Gyroscope Calibration:
- Place the drone on a perfectly level surface (flat ground or table).
- In the flight software, initiate gyro calibration. This process sets the neutral point (zero) for the gyroscope, allowing it to recognize the drone’s orientation as level during flight.
- Accelerometer Calibration:
- Place the drone on a flat surface to perform the accelerometer calibration.
- Initiate the accelerometer calibration in the flight software. This step ensures the system accurately detects the drone’s orientation and movement relative to gravity, which is critical for stabilization.
- Test Calibration:
- After calibration, test the drone on the ground to check for any drifting or unexpected movements when the drone is idle. The drone should remain level when not in motion, indicating proper calibration.
Configuring PID and Flight Modes
PID Tuning (Proportional, Integral, Derivative):
Purpose: PID control allows the flight controller to maintain stability by adjusting the motor speeds. Proper PID tuning ensures the drone remains stable and responsive to flight inputs.
Process:
- Adjust PID Values in flight software (like Betaflight or INAV). The three values control how sensitive the drone is to changes in orientation:
- Proportional (P): Determines how much the drone will react to an error in orientation.
- Integral (I): Corrects long-term errors, like drift.
- Derivative (D): Helps smooth rapid movements and reduce oscillations.
- Begin with default values and make gradual adjustments. Start with the pitch and roll axes (for forward/backward and side-to-side movement), then move to yaw (rotation around the vertical axis).
- Test Flights: After each adjustment, test the drone’s response. Start with a low and controlled altitude to verify stability, ensuring no wobbling or overshooting of corrections.
Flight Mode Configuration:
Purpose: Flight modes define how much control you have over the drone’s behavior. Different modes allow for varying levels of stabilization, acrobatic flight, and GPS position holding.
Process:
- Stability Mode:
- The flight controller keeps the drone level, preventing it from flipping or spinning uncontrollably. This mode is great for beginners because it auto-corrects orientation. It is typically set as the default mode in flight software.
- Acro Mode (Manual Mode):
- Acro mode disables stabilization, providing full control to the pilot. The drone will continue rotating and tilting until the pilot actively corrects it. This mode is essential for aerial maneuvers and advanced tricks.
- GPS Hold Mode (if equipped with GPS):
- With a GPS module, this mode allows the drone to maintain its position in the air by adjusting motor speeds to counteract wind or other forces. It also maintains altitude and location using GPS, which is ideal for precise hovering and location-based flights.
- Altitude Hold Mode:
- In this mode, the drone maintains a fixed altitude, so the pilot does not have to constantly adjust the throttle. It’s useful for stabilizing altitude during flight, making it easier to focus on navigation or capturing footage.
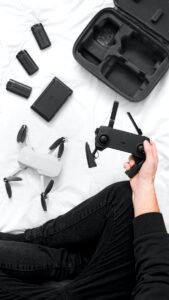
12. First Flight Preparation

Safety Checklist
Before powering up your drone for its first flight, ensure all components are correctly installed and functioning properly.
- Propellers: Securely attach propellers, ensuring they match the correct rotation direction (clockwise and counterclockwise as per motor configuration).
- Battery Check: Ensure the battery is fully charged and securely connected to prevent mid-flight disconnections.
- Frame and Components: Inspect for loose screws, cracked parts, or any signs of wear that could cause mechanical failure.
- Range Test: Test the remote control signal range in a safe area to confirm the transmitter and receiver are properly bound.
- Fail-Safe Settings: Configure fail-safe features in your flight controller to automatically return home or land safely in case of signal loss.
- Weather Conditions: Avoid flying in strong winds, rain, or extreme temperatures, as these can impact flight stability and battery performance.
- Emergency Procedures: Have a plan for landing in case of failure, including using disarm switches on the controller to cut motor power in emergencies.
Selecting a Suitable Test Location
Choosing the right test site is essential for a successful and safe first flight.
- Open Area: Select a spacious, obstacle-free location, such as an empty field or park, away from trees, buildings, and power lines.
- Legal Compliance: Check local regulations regarding drone flying, including height restrictions and designated flight zones.
- Low Interference: Avoid areas with high RF interference, such as near Wi-Fi networks, power stations, or crowded urban zones, which could disrupt signal transmission.
- Soft Landing Zone: Ensure the area has grass or another soft surface to minimize damage in case of an unplanned landing.
Initial Hover Test
Before performing a full flight, conduct a controlled hover test to ensure all systems function correctly.
- Arming the Drone: Power on the drone, place it on a level surface, and arm the motors according to your controller’s setup.
- Gradual Throttle Increase: Slowly increase the throttle until the drone lifts off the ground by a few centimeters. Observe for any instability.
- Checking Stability: Monitor for unwanted drifting or wobbling. If the drone tilts without input, recalibrate the gyroscope and accelerometer.
- Basic Control Test: Gently test pitch, roll, and yaw movements to confirm that controls respond correctly.
- Low-Altitude Hover: Maintain a steady hover at a low altitude (1-2 meters) for 30-60 seconds, ensuring consistent motor performance.
- Landing: Gradually reduce throttle and land smoothly. Analyze flight data to make necessary adjustments before attempting higher-altitude flights.
13. Troubleshooting Common Issues
Motor and ESC Problems
Problem: Motors are not spinning, spinning in the wrong direction, or behaving erratically.
Solutions:
- Check Wiring: Ensure the motor connections to the ESCs are correct and secure.
- Reverse Motor Rotation: If a motor spins in the wrong direction, swap any two of the three motor wires or adjust settings in the flight controller software.
- ESC Calibration: Calibrate ESCs using Betaflight, INAV, or the appropriate software to ensure throttle signals are correctly interpreted.
- Firmware Updates: Update ESC firmware (BLHeli or SimonK) to ensure compatibility with the flight controller.
- Overheating Prevention: Check for excessive ESC heating, which may indicate poor ventilation or an overloaded power system.
Flight Controller Errors
Problem: The drone does not stabilize, drifts uncontrollably, or fails to respond to input.
Solutions:
- Gyroscope and Accelerometer Calibration: Perform a recalibration in the flight controller software while ensuring the drone is on a level surface.
- PID Tuning: If the drone oscillates or feels unresponsive, adjust the PID values to optimize stability and control.
- Flight Mode Settings: Verify that the correct flight mode (stabilized, acro, GPS hold) is selected and properly configured.
- Power Supply Check: Ensure the flight controller is receiving adequate voltage from the power distribution board.
- Check for Vibration Issues: Soft-mount the flight controller using rubber dampeners to reduce vibration interference.
Connectivity and Signal Issues
Problem: Weak or lost signal between the transmitter and receiver, causing control lag or disconnections.
Solutions:
- Proper Receiver Binding: Rebind the transmitter and receiver if the connection is inconsistent.
- Antenna Positioning: Adjust antenna placement to avoid obstruction and ensure maximum signal reception.
- Interference Check: Avoid areas with high electromagnetic interference (Wi-Fi routers, cell towers, large metal structures).
- Failsafe Settings: Ensure fail-safe features are configured correctly to prevent flyaways in case of signal loss.
- Firmware Updates: Update both the transmitter and receiver firmware to ensure compatibility with the flight controller.
14. Optimizing Performance

Propeller Selection Tips:
- Match Size and Pitch: The propeller size and pitch should be aligned with the specifications of your motor. A propeller too large or too small can negatively affect motor performance and flight stability.
- Use Balanced Propellers: Properly balanced propellers minimize vibrations, which can lead to smoother flights and reduced wear on your drone’s components.
- Experiment with Materials: Different materials (plastic, carbon fiber, wood) can affect performance. For example, carbon fiber props are lighter and more efficient, but plastic props are more durable and easier to repair.
Battery Efficiency Optimization:
- Use High-Quality LiPo Batteries: Select batteries with the appropriate C-rating (discharge rate) to ensure they can supply the required power without damaging the cells. Higher C-rating batteries allow for more power, which is critical during fast maneuvers or heavy lifting.
- Monitor Battery Voltage: Regularly check battery voltage during flights and avoid deep discharges (below 20%) to extend battery lifespan.
- Optimize Flight Weight: Keep your drone as light as possible to reduce power consumption. Avoid overloading the drone with unnecessary accessories that could strain the battery.
Advanced Flight Tuning:
- Adjust PID Settings: Refine the PID values to achieve smoother and more responsive controls, making your drone more stable during maneuvers.
- Experiment with Flight Modes: Test different flight modes for various flight conditions, ensuring your drone performs optimally under each setting.
- Use Logging Tools: Utilize logging software (like Betaflight) to analyze flight behavior and identify areas for improvement. Refine tuning and settings based on data collected during flights.
15. Maintenance and Repairs
Regular Inspection Routines:
- Check for Loose Screws and Damage: Before each flight, inspect the drone for loose screws, structural damage, or worn-out parts.
- Clean Motors and Electronics: Dust accumulation can affect motor efficiency and cause overheating. Regular cleaning helps maintain optimal performance.
- Inspect Battery Health: Regularly balance charge LiPo batteries and check for any signs of wear, swelling, or damage to ensure safe operation.
Common DIY Fixes:
- Resolder Loose or Broken Connections: Resolder any loose wires or broken connections to avoid electrical issues that can arise during flight.
- Replace Damaged Propellers and Motor Mounts: Damaged propellers or motor mounts can significantly affect performance, so replace them as needed.
- Reinforce the Frame: Use epoxy or carbon fiber reinforcement to repair or strengthen the frame in case of damage from hard landings or crashes.
Upgrading Components Over Time:
- Swap Motors and ESCs: Upgrade your motors and ESCs to higher-efficiency models to improve flight performance and battery life.
- Update Flight Controller Firmware: Flash your flight controller with the latest firmware to access new features and improvements.
- Integrate Additional Sensors: Adding sensors (e.g., barometers, magnetometers) can enhance flight stability and increase drone functionality.
16. Advanced DIY Drone Modifications

Adding FPV Cameras and Gimbals:
- FPV Camera Selection: Choose a camera with low latency for better real-time control. A camera with a wider field of view (FOV) will give a more immersive flying experience.
- Gimbal Installation: Install a gimbal to stabilize the camera and prevent shaky footage, especially during dynamic maneuvers.
- Ensure Proper Transmission Range: Ensure the video transmission system has a strong and reliable signal, especially if flying over long distances.
Long-Range and Autonomous Upgrades:
- Long-Range Radio Systems: Use long-range radio control systems (e.g., Crossfire, TBS) to extend control distances beyond the typical range of standard controllers.
- GPS and Telemetry Integration: Adding a GPS module and telemetry system will allow for more precise navigation and real-time data transmission back to the pilot.
- Autonomous Flight Planning: Experiment with autonomous flight software to program waypoints and enable automated missions.
Customizing Flight Modes and Features:
- LED Lighting: Add LED lighting for improved visibility, especially during low-light conditions. It can also enhance the aesthetics of your drone.
- Waypoint Navigation: Program your drone to fly specific waypoints autonomously, ideal for surveying or repetitive tasks.
- Failsafe Routines: Implement failsafe routines (e.g., return-to-home, landing) for added safety in case of signal loss or low battery.
17. Legal Considerations and Safety Guidelines

Understanding Local Drone Laws:
- Research Regulations: Familiarize yourself with national and regional drone laws, including flight altitude limits, restricted airspace, and permitted flight zones.
- No-Fly Zones: Be aware of no-fly zones near airports, military areas, and other sensitive locations.
- Permits and Registrations: Check if your country requires drone registration or specific permits for commercial drone use, or if your drone exceeds weight thresholds.
Ensuring Safe Flight Practices:
- Maintain Visual Line of Sight: Always keep your drone within visual line of sight during flight to ensure safety.
- Avoid People and Animals: Never fly near people, animals, or private property. Always maintain a safe distance.
- Monitor Weather Conditions: Check the weather before each flight to ensure conditions are safe for flying (e.g., avoiding high winds, rain, or lightning).
Registering Your Drone (If Required):
- Check for Registration Requirements: Research if your drone needs to be registered with local aviation authorities.
- Label Your Drone: If registration is required, label your drone with the identification number or registration details.
- Comply with Safety Restrictions: Ensure your drone complies with weight and safety restrictions to avoid fines or legal issues.
Wrapping Up: Your DIY Drone Journey
Congratulations! You’ve reached the final step in your DIY drone-building adventure. By following this guide, you’ve not only built a custom drone but also gained valuable hands-on experience in electronics, aerodynamics, and flight mechanics. Whether you’re flying for fun, photography, or innovation, your hard work has paid off!
Remember, the learning doesn’t stop here. Keep experimenting, tweaking, and upgrading your drone to improve performance and explore new possibilities. Join online drone communities, share your builds, and learn from other enthusiasts.
Above all, fly responsibly, respect safety guidelines, and enjoy the thrill of piloting something you created with your own hands. Happy flying, and may your DIY drone adventures continue to soar!